Setting Up Splunk Universal Forwarder with Docker
In this guide, we’ll walk through setting up a Splunk environment using Docker containers. This setup includes three key components:
- Standalone Splunk: Serves as the indexer to store and manage logs.
- Universal Forwarder (UF): Forwards logs from various sources to the Splunk indexer.
- Logger: Generates random logs and writes them to a file.
By the end of this guide, you’ll have a fully functional Splunk setup capable of indexing and searching logs.
The associated code is available here
Prerequisites
Before we begin, ensure you have the following installed on your system:
- Docker
- Docker Compose
Overview of the configuration
In this setup, we use two main files to define and run our Splunk environment: a .env file and a docker-compose.yml file.
.env
The .env file contains configurations for the Docker containers. Here’s its content:
INDEXER_IMAGE=splunk/splunk:9.2
LOGGER_REGISTRY_ADDRESS=ghcr.io
LOGGER_REGISTRY_USERNAME=veben
LOGGER_PACKAGE=go_random_logger
LOGGER_VERSION=1
LOGGER_IMAGE=${LOGGER_REGISTRY_ADDRESS}/${LOGGER_REGISTRY_USERNAME}/${LOGGER_PACKAGE}:${LOGGER_VERSION}
UF_IMAGE=splunk/universalforwarder:9.0
LOGS_FOLDER=/var/log
LOGS_FILE=random.log
We specify the image versions for the three containers, as well as the path to the log file where the logger writes logs and the UF reads them before sending them to the indexer.
docker-compose.yml
The docker-compose.yml file describes the different containers and their configurations. It sets up a comprehensive logging environment where logs generated by the logger service are monitored by the universalforwarder and forwarded to the indexer for storage and analysis. The network configuration ensures all services can communicate securely within the splunknet network.
Here’s the associated content:
networks:
  splunknet:
    driver: bridge
    attachable: true

services:
  indexer:
    networks:
      splunknet:
        aliases:
          - indexer
    image: ${INDEXER_IMAGE:-splunk/splunk:latest}
    hostname: indexer
    container_name: indexer
    environment:
      - SPLUNK_START_ARGS=--accept-license
      - SPLUNK_STANDALONE_URL=indexer
      - SPLUNK_PASSWORD
    ports:
      - 8000:8000
    volumes:
      - ${LOGS_FOLDER}:${LOGS_FOLDER}

  # Script that write random logs to ${LOGS_FOLDER}/${LOGS_FILE} file
  # See: https://github.com/veben/go_random_logger
  logger:
    networks:
      splunknet:
        aliases:
          - logger
    image: ${LOGGER_IMAGE:-ghcr.io/veben/go_random_logger:latest}
    volumes:
      - ${LOGS_FOLDER}:${LOGS_FOLDER}

  universalforwarder:
    networks:
      splunknet:
        aliases:
          - universalforwarder
    image: ${UF_IMAGE:-splunk/universalforwarder:latest}
    hostname: universalforwarder
    container_name: universalforwarder
    environment:
      - SPLUNK_START_ARGS=--accept-license
      - SPLUNK_STANDALONE_URL=indexer # equivalent to /opt/splunkforwarder/bin/splunk add forward-server splunk-indexer:9997
      - SPLUNK_ADD=monitor ${LOGS_FOLDER}/${LOGS_FILE} # equivalent to ./opt/splunkforwarder/bin/splunk add monitor '${LOGS_FOLDER}/${LOGS_FILE}'
      - SPLUNK_PASSWORD
    ports:
      - 9997:9997
    volumes:
      - ${LOGS_FOLDER}:${LOGS_FOLDER}
    depends_on:
      - indexer
      - logger
Launching the Containers
To launch the containers, use this command, replacing <complex_password> with a secure password:
SPLUNK_PASSWORD=<complex_password> docker-compose up -d
This command will start the necessary Docker containers in detached mode. Allow a few minutes for all containers to launch properly. You can verify their status using the command:
docker container ls
Testing log indexing
Once the containers are up and running, follow these steps to verify that logs are being indexed correctly:
- Open a web browser and navigate to
http://localhost:8000

-
Log in with the username
adminand the password you set (<complex_password>). -
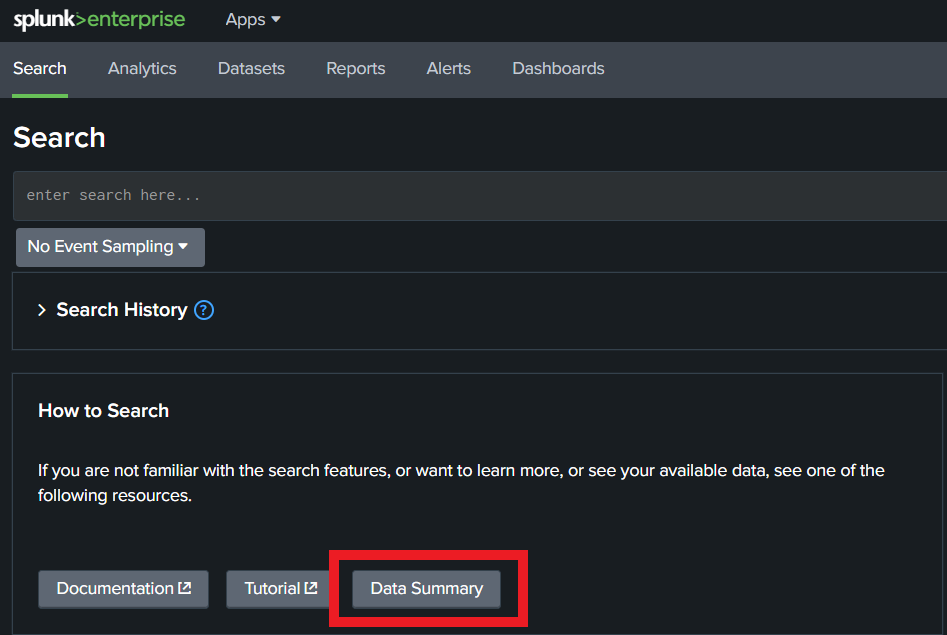
Navigate to Search & Reporting

- Click on Data Summary

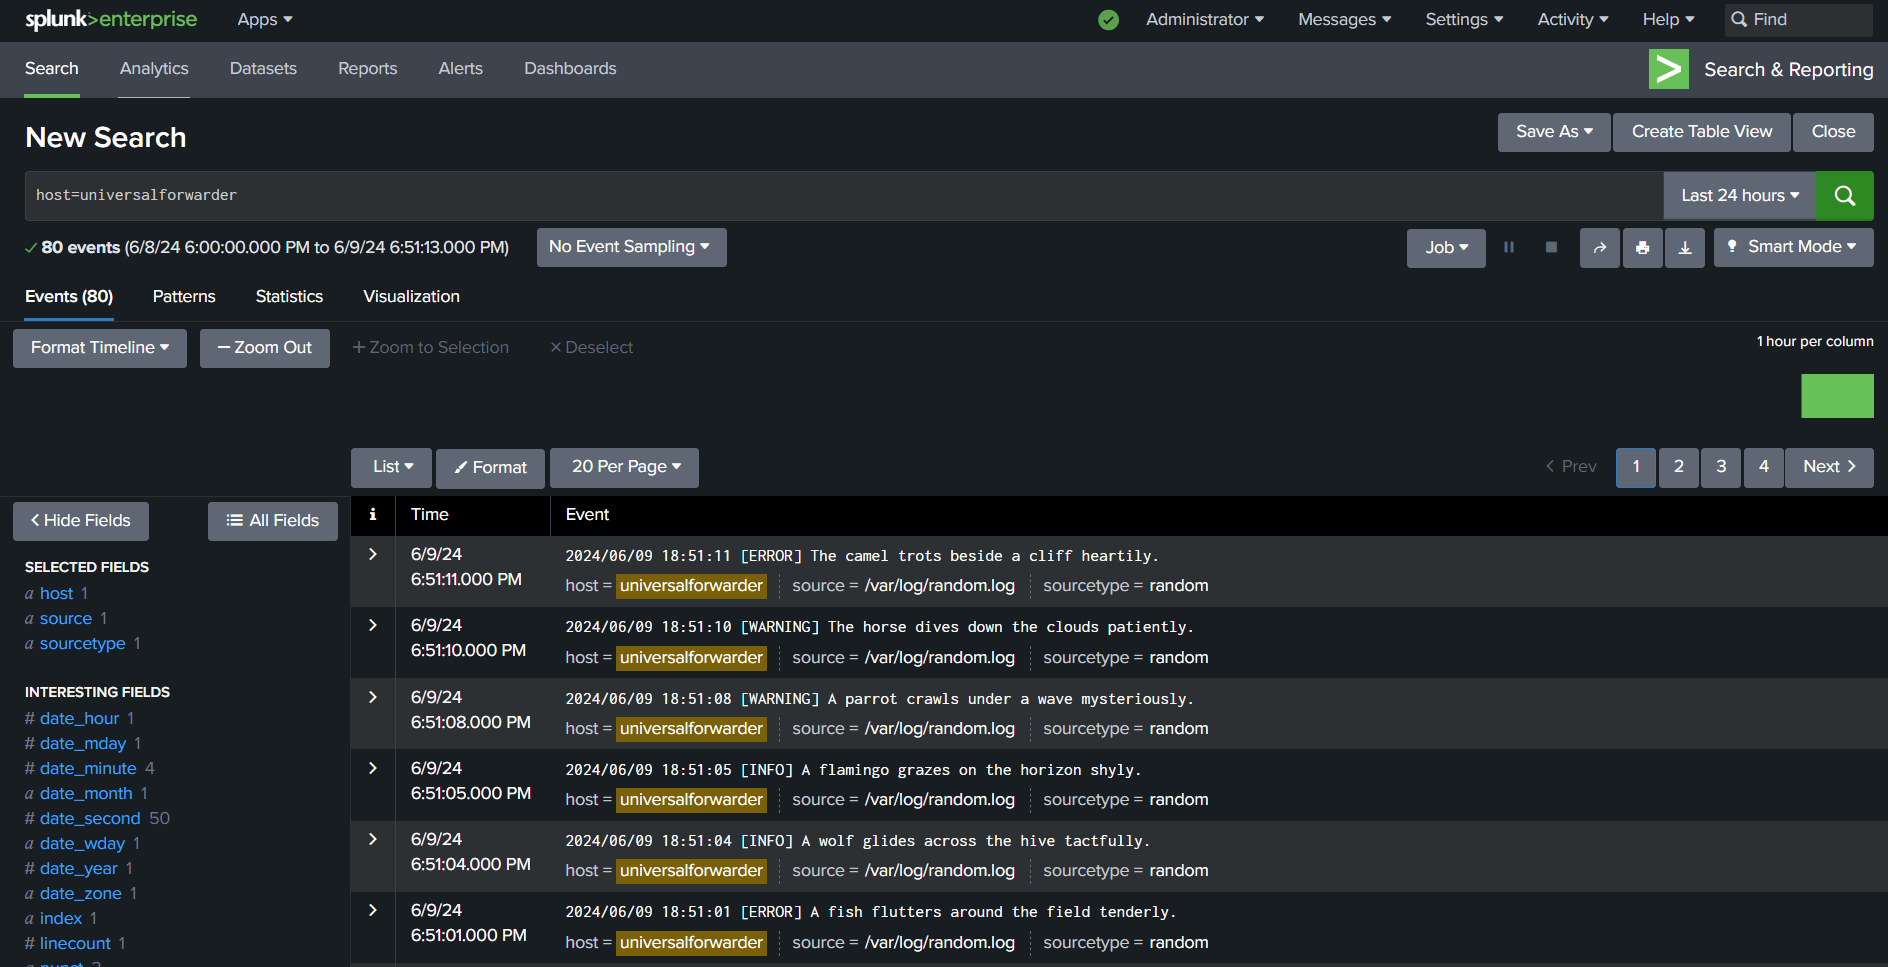
- Select the host universalforwarder to view incoming logs

- Verify the logs are received

By following these steps, you have successfully set up a Splunk environment using Docker containers and verified that logs are being forwarded and indexed properly. This setup provides a robust and scalable solution for log management and analysis. Happy Splunking!

